Essential Gear for Wildlife Photography
You can read every gear guide on the internet. You can watch every YouTube review, compare every spec sheet, and bookmark every “best of” list. But nothing teaches you what gear you actually need quite like standing in the field, missing shots, running out of battery, or realizing you packed the wrong lens.
We’ve been there. All of it. And that’s exactly why we built this guide.
This isn’t a spec sheet. It’s a field-tested, hard-won breakdown of the essential gear every wildlife photographer needs — from your first camera body to the accessories that seem minor until the moment you desperately need them and don’t have them.
Let’s get equipped.
Choosing the Right Camera for your Wildlife Journey
Here’s the truth about cameras — the best one is the one that gets out of your way and lets you focus on the animal in front of you. And after years of shooting wildlife across America, we’ve learned that the camera you start with and the camera you end up with are often very different things.
DSLR vs. Mirrorless: Unveiling the Champion
For years, DSLRs were the gold standard for wildlife photography. Rugged, reliable, with a vast selection of lenses and a satisfying mechanical click every time you fired the shutter. Many incredible wildlife images have been captured on DSLRs and honestly, they still get the job done.
However, mirrorless cameras have changed everything — and if you haven’t made the switch yet, here’s something you might not have considered: silence.
That mechanical click of a DSLR? Wildlife notices it. Other photographers notice it. In a hide or a blind, surrounded by other shooters, every shutter click announces your presence. Furthermore, a skittish whitetail deer or a nesting bird doesn’t know what that sound is — but they know something is different, and different means danger.
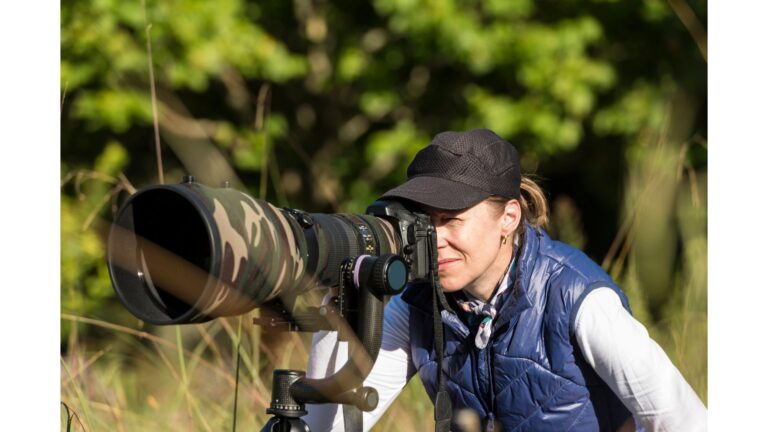
Silence Is Golden — My Switch to the Nikon Z8
I made the switch to the Nikon Z8 and the difference was immediate and striking. Suddenly I was shooting in near-complete silence. No click. No clunk. Just the image. Wildlife that would have flinched at the sound of my old DSLR simply carried on — completely unaware. Additionally, other photographers around me weren’t being disturbed by the constant mechanical rhythm of my camera firing.
One thing nobody warns you about though — silence can be disorienting at first. When you’re used to hearing the shutter fire, shooting without that audio feedback feels strange. You find yourself wondering whether you actually took the shot. Consequently, most mirrorless cameras including the Nikon Z8 have a solution — a subtle electronic shutter sound you can dial up just enough to confirm you’re firing, without broadcasting your presence to everything within 50 yards. It’s a small thing, but it matters. Therefore, if you’re making the switch, turn that subtle sound on until you adjust. You’ll thank yourself later.
Mirrorless advantages for wildlife photography:
- Silent or near-silent shooting
- Faster burst rates — more frames per second
- Lighter and more compact bodies
- Superior electronic viewfinders
- Faster, more accurate autofocus tracking
The one DSLR advantage worth mentioning: Lens selection. If you already have a collection of quality DSLR glass, check whether your mirrorless system has an adapter before switching — most do, and most work excellently.
Sensor Size Matters: Full Frame or Crop Frame?
Full frame sensors capture more light, deliver better low-light performance, and produce shallower depth of field for that beautiful background separation. For landscapes and portraits, full frame wins almost every time.
However, for wildlife photography the conversation is more nuanced. In fact, a crop sensor effectively multiplies your focal length — a 400mm lens on a crop sensor body behaves more like a 600mm lens. As a result, for photographers on a budget who can’t yet invest in super-telephoto glass, a crop sensor body can actually bring distant wildlife significantly closer without spending a cent more on lenses.
Megapixel Mania: Finding the Perfect Resolution
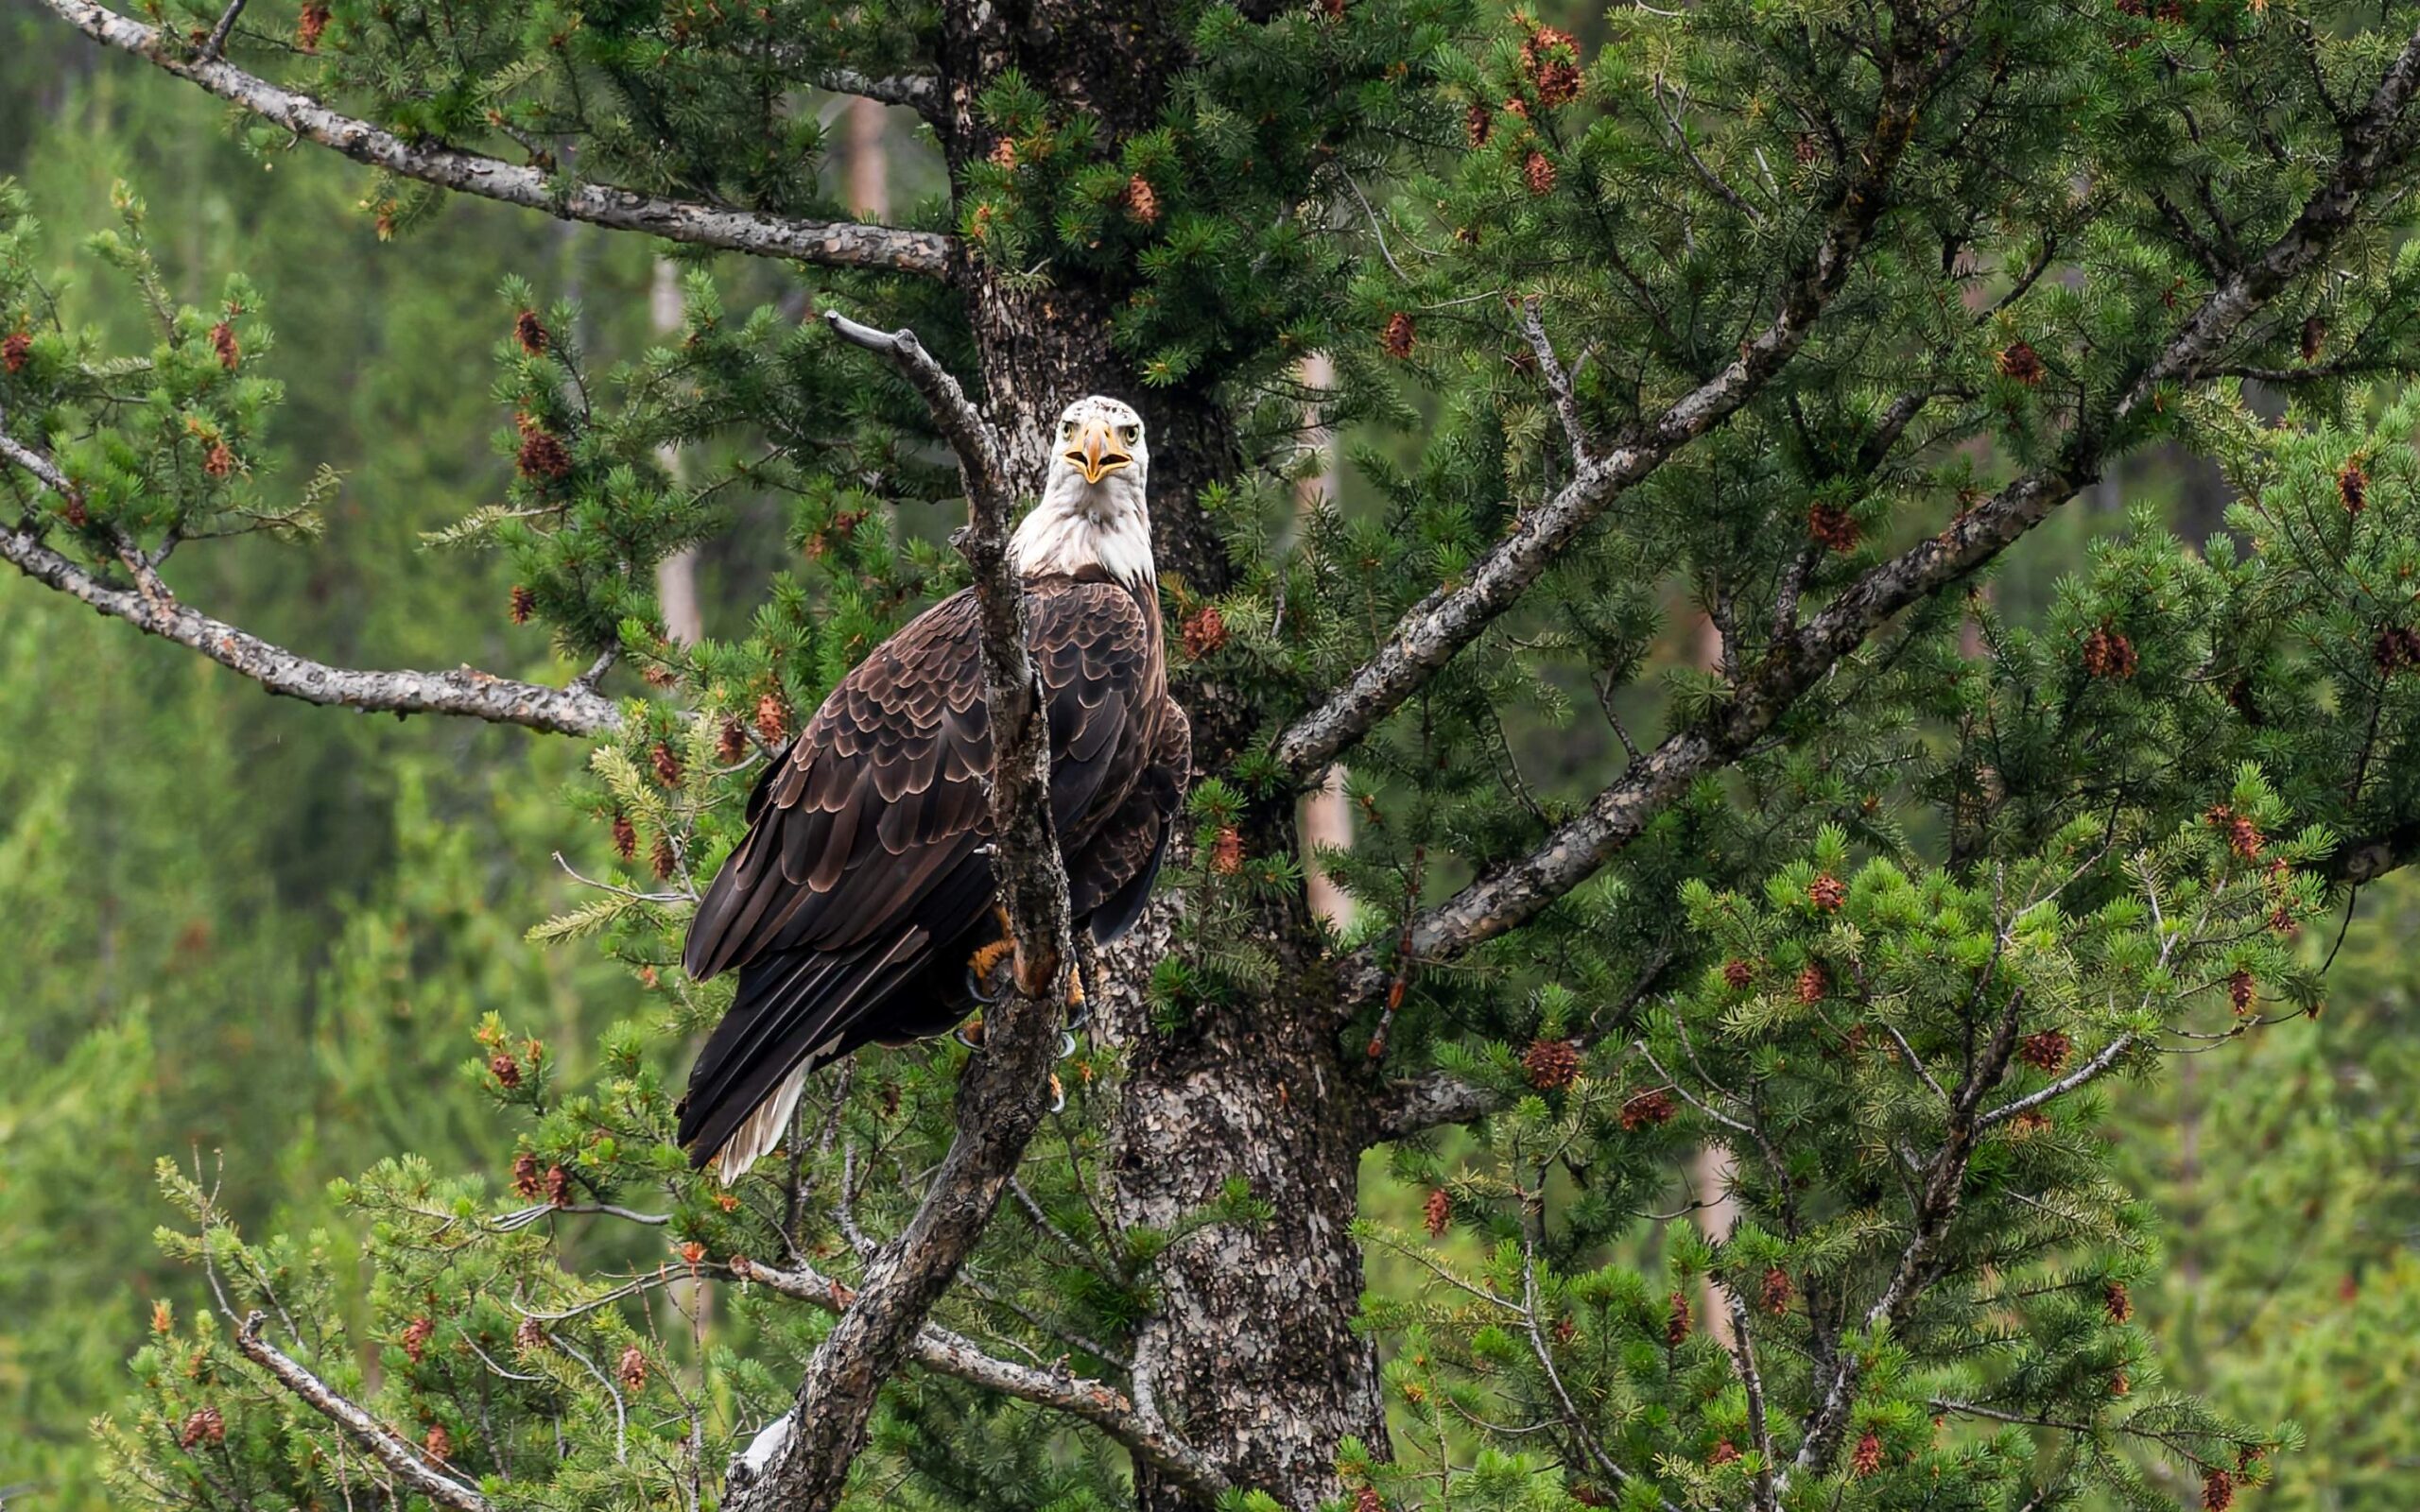
More megapixels means more detail — but it also means larger files, faster card filling, and more processing power required. For wildlife photography where burst shooting is common, 24-45 megapixels is the sweet spot. Furthermore, you need speed more than you need resolution when a bald eagle is dropping into a dive.
Zooming in on the Action: Selecting Your Lens
Your lens is your window into the wild world. Here’s what to consider when choosing the right one for wildlife photography:
Telephoto Powerhouses:
If there’s one thing that separates good wildlife images from great ones, it’s glass. Your camera body matters. But your lens? That’s where the magic — or the frustration — really happens.
And let’s be honest about something right away. Lenses are expensive. The best wildlife glass on the market costs more than most people’s cars. However, that doesn’t mean you can’t capture stunning wildlife images on a budget. It just means you need to understand what you’re working with — and what you’re giving up.
The Aperture Reality — f/2.8 vs f/4.5-6.3
Here’s something nobody tells beginners clearly enough. That kit zoom lens — the one that came with your camera or cost a few hundred dollars — probably opens to f/4.5 at its widest and f/6.3 at its longest. And in the middle of the day, in bright sunlight, that’s absolutely fine.
But wildlife photography doesn’t always happen in bright sunlight. In fact, the best wildlife photography almost never does. Dawn and dusk — the golden hours — are when animals are most active and most beautiful to photograph. Furthermore, dense forests, overcast days, and stormy skies are where some of the most dramatic images happen.
At f/6.3 in low light, you face a choice — raise your ISO and introduce grain, slow your shutter speed and risk blur, or miss the shot entirely. However, a lens that opens to f/2.8 or even f/4 lets in significantly more light. As a result, you can keep your shutter speed fast enough to freeze action and your ISO low enough to maintain clean images — even as the light fades.
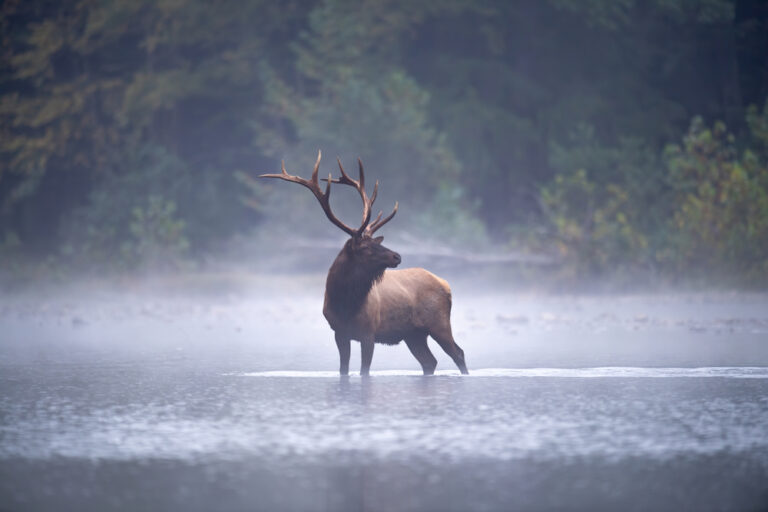
When the Light Fades — a Personal Lesson
I’ve stood at the edge of a meadow at dusk, watching elk move through the last of the golden light, and felt the frustration of a lens that simply couldn’t gather enough light to give me the shutter speed I needed. Consequently, those shots were softer than I wanted. It’s a feeling you remember — and it’s the moment most photographers start seriously thinking about faster glass.
Nevertheless, faster glass costs significantly more. Therefore, understand the tradeoff going in rather than being surprised by it later.
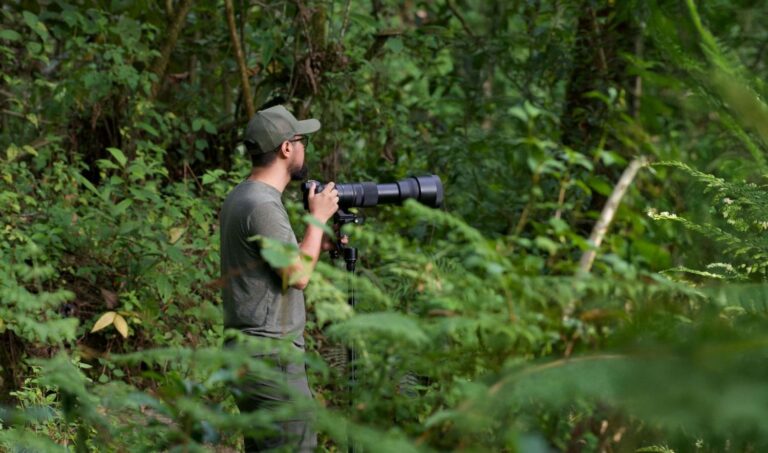
Telephoto Lenses — The Wildlife Photographer’s Best Friend
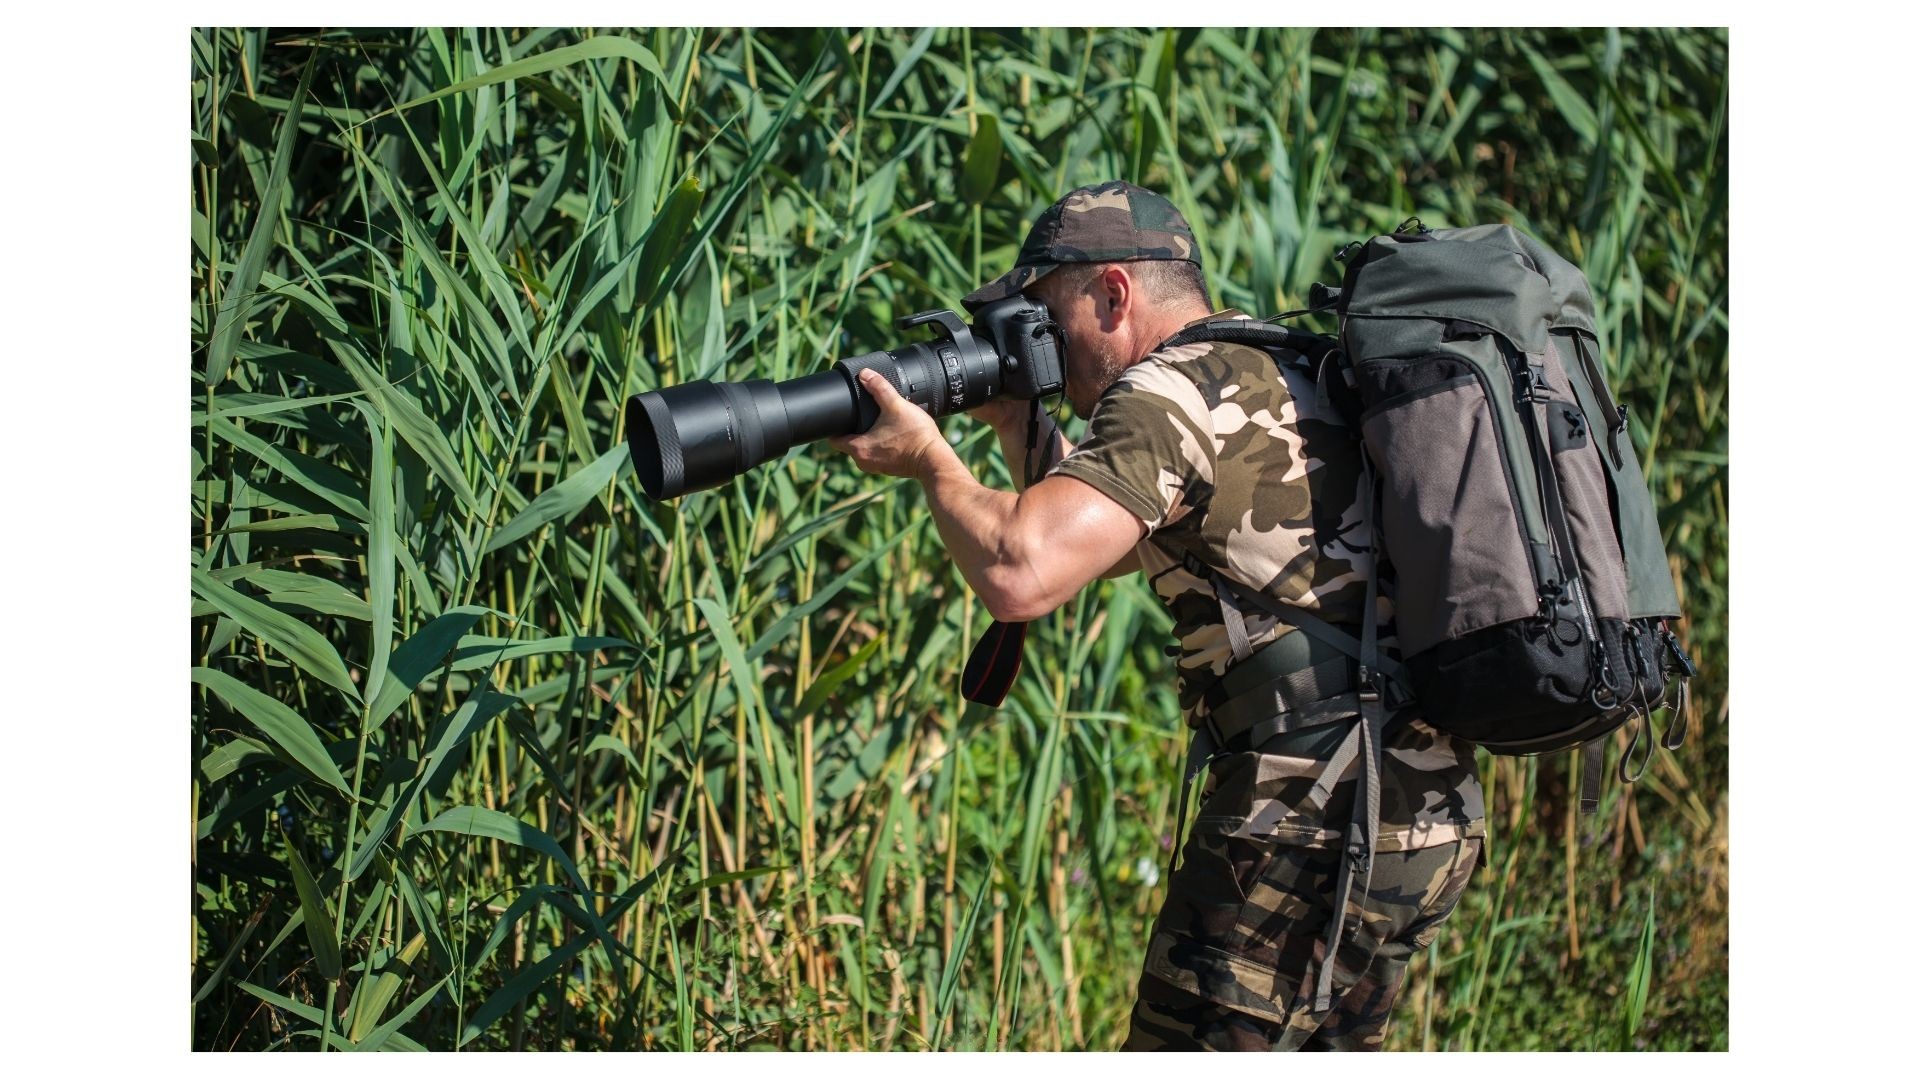
Wildlife photography and telephoto lenses are inseparable. You need reach — the ability to fill the frame with a subject that is far enough away to behave naturally and not be disturbed by your presence.
For most wildlife photography, start at 300mm minimum. Ideally, 400mm to 600mm gives you the reach for birds, smaller mammals, and any situation where staying at a respectful distance matters. Furthermore, for birds in flight specifically, longer focal lengths give you more room to work with when the subject is small against a big sky.
However — and this is important — bigger isn’t always better.
I’ve made this mistake myself. Packed the wrong lens for the situation. Headed out expecting one thing, encountered another, and stood there with 800mm of prime glass when what I needed was something shorter and faster to handle a subject that was closer than expected.
Additionally, the big prime lenses — 500mm, 600mm, 800mm — are heavy. Seriously heavy. A 600mm f/4 prime can weigh over 6 pounds before you’ve added a camera body. Therefore, if you’re hiking any distance into the backcountry, that weight matters enormously. In fact, I’ve seen photographers exhaust themselves on the hike in and have nothing left for the patient, still shooting that great wildlife photography demands.
A practical lens kit for wildlife photographers:
For most situations, a versatile telephoto zoom in the 100-500mm or 200-600mm range gives you the flexibility to handle whatever the field throws at you. As a result, you’re not locked into one focal length when the situation changes. Furthermore, pair it with a mid-range zoom for environmental shots and you have a kit that covers almost everything without breaking your back or your budget.
Prime vs. Zoom Lenses:
Prime lenses are sharper, faster, and optically superior. Zoom lenses are flexible, practical, and far more forgiving in the unpredictable situations wildlife photography creates. Consequently, for most photographers — especially those still building their kit — a high quality telephoto zoom is the smarter starting investment.
Upgrade to prime glass when you know exactly what focal length you use most, when you’re shooting in consistently low light conditions, and when your budget allows. Not before.
Double Check Your Bag Before You Leave
This one comes from painful personal experience. I’ve arrived at a location — sometimes after a long drive or hike — and reached into my bag for a lens that wasn’t there. The wrong lens was packed. Or the right lens was left on the table at home.
Therefore, develop a pre-shoot checklist. Know exactly which lenses you need for the location, the wildlife, and the light conditions you’re expecting. Furthermore, lay everything out the night before and check it twice. The wildlife won’t wait while you drive back for the lens you forgot.
Focal Length: How Far Do You Want to Reach?
Focal length is simply how much of the scene your lens captures. However, choosing the right one for wildlife photography isn’t always straightforward. Longer focal lengths bring distant subjects closer — filling the frame with detail from a safe, respectful distance. Shorter focal lengths capture wider areas — useful for environmental shots that show the animal in its habitat.
Furthermore, the right focal length depends entirely on what you’re photographing. Birds in flight demand longer reach — a small warbler against a big sky needs every millimeter of focal length you can get. In contrast, larger animals like bison or elk that you can observe from a vehicle or a fixed position may not require the same extreme reach. Additionally, consider your shooting environment. Dense forest limits how far you can see anyway — consequently, an 800mm prime in thick woodland is often overkill compared to a versatile zoom that lets you adapt quickly.
As a result, think about your most common shooting scenarios before investing in glass. Match your focal length to your wildlife — not to what looks impressive on paper.
Aperture Matters: Balancing Light and Sharpness:
Aperture is the opening in your lens that controls how much light reaches the sensor. Furthermore, it controls depth of field — how much of the image is in sharp focus. A wider aperture (lower f-number like f/2.8 or f/4) lets in more light and creates a beautifully blurred background that separates your subject from its surroundings. In contrast, a narrower aperture (higher f-number like f/8 or f/11) keeps more of the scene in sharp focus but requires more light to achieve a proper exposure.
In wildlife photography, you’ll constantly balance these two needs. For instance, at dawn when a grizzly emerges from the treeline into soft golden light, a wider aperture keeps your shutter speed fast enough to freeze movement while still gathering enough light for a clean image. However, for a stationary subject in bright midday light, a narrower aperture gives you edge-to-edge sharpness that holds up to cropping and enlargement.
Consequently, understanding aperture isn’t just technical knowledge — it’s the difference between coming home with the shot and coming home with an excuse. Therefore, practice shooting at different apertures in different light conditions before you head into the field. Additionally, know your lens’s sharpest aperture — most lenses perform best one or two stops down from wide open. That sweet spot is where your best images will consistently come from.
Image Stabilization: A Must-Have for Steady Shots:
Wildlife photography often means long lenses, low light, and situations where a tripod simply isn’t practical. In fact, there will be moments when the action is happening too fast to set up any support system at all. Furthermore, handholding a 500mm lens at dusk while tracking a moving subject is a recipe for blur — unless you have image stabilization working in your favor.
Image stabilization — whether built into the camera body, the lens, or both — counteracts the natural movement and vibration of handholding. As a result, you can shoot at slower shutter speeds than would otherwise be possible and still come away with sharp, usable images. For wildlife photography specifically, this can mean the difference between a sharp frame and a blurry one when the light drops and your shutter speed drops with it.
In body vs in lens stabilization — which is better?
In practice, both work well. However, the most effective systems combine both — camera body stabilization working in tandem with lens stabilization for maximum effect. Furthermore, some modern mirrorless systems like the Nikon Z8 have extraordinarily effective in-body stabilization that works even with lenses that have no stabilization of their own.
Therefore, when evaluating cameras and lenses for wildlife photography, don’t overlook stabilization specs. Additionally, test your own steady-hand limit — most photographers can handhold reliably at a shutter speed equal to the reciprocal of their focal length. In other words, at 400mm you want at least 1/400th of a second. With good stabilization, you can push well below that. Consequently, in the golden hour when light is low and wildlife is most active, that extra margin could save the shot.
Supporting Your Gear: Tripods, Monopods and Heads
Ask any experienced wildlife photographer what single investment made the biggest difference to their images and the answer is rarely a camera body or a lens. Furthermore, it’s almost never a filter or an accessory. In fact, more often than not the answer is a quality support system — and specifically, learning when to use which one.
We’ve covered support systems in depth across several dedicated guides on PhotoWILD Gear. However, here’s what you need to know as a foundation before diving deeper.
Tripods — The Foundation of Sharp Images
A quality tripod is non-negotiable for planned, stationary wildlife shoots. Consequently, if you’re set up at a salmon run waiting on bears, positioned at a meadow edge at dawn waiting on elk, or parked at a raptor perch waiting on a bald eagle — a tripod is your best friend. Furthermore, carbon fiber is the material of choice for wildlife photographers. Lighter than aluminum yet stronger than steel, it handles backcountry punishment without punishing your back on the hike in.
👉 Read our full guide: Best Tripods for Wildlife Photographers
Tripod Heads — The Part Everyone Gets Wrong
Your tripod is only as good as the head sitting on top of it. In fact, the wrong head can make even the best tripod frustrating to use for wildlife. A ball head offers quick, flexible positioning — great for general use. However, for tracking fast-moving subjects like birds in flight, a gimbal head is a game changer. By balancing your lens at its center of gravity, a gimbal lets even the heaviest telephoto glass float and swing effortlessly. As a result, panning with a bird in flight becomes fluid and natural rather than stiff and frustrating.
👉 Read our full guide: Best Tripod Heads for Wildlife Photography
Monopods — Speed and Mobility
When the action is moving fast, a monopod is your best friend. One leg instead of three means setup in seconds. Repositioning takes a heartbeat. Furthermore, you get the freedom to chase your subject through dense brush or across uneven terrain without being anchored to one spot. Consequently, many wildlife photographers carry both — a tripod for the planned shoot and a monopod for everything else.
Bean Bags — The Secret Weapon
Never underestimate a bean bag. Draped over a vehicle window, a fence post, or a rock. A bean bag provides a surprisingly stable and completely silent shooting platform. Additionally, for national park photography where wildlife is habituated to vehicles, shooting from your car window with a bean bag is often the single most effective way to get close, undisturbed shots of large mammals.
Ground Pods — Get Low, Get the Shot
Some of the most compelling wildlife images are taken at ground level. Nose to nose with a fox. Eye-to-eye with a nesting bird. Belly-down in the grass waiting on a pronghorn. A ground pod keeps your camera rock steady at the animal’s eye level. As a result, you create those intimate, immersive images that truly connect the viewer with the wild.
👉 Read our full guide: Beyond Tripods — Camera Support Systems for Wildlife Photography
Capturing the Moment: Essential Accessories
Cameras and lenses get all the glory. However, it’s the accessories — the unglamorous, easy-to-overlook additions to your kit — that will make or break your day in the field. In fact, I’d argue that more great wildlife shots have been lost to dead batteries and full memory cards than to any camera or lens limitation. Furthermore, I know this from painful personal experience.
Memory Cards — Never, Ever Go Out With Just One
Mirrorless cameras are incredible. Fast burst rates, silent shooting, exceptional autofocus — everything a wildlife photographer could want. However, that speed comes at a cost. Mirrorless cameras eat through memory cards at a rate that will genuinely surprise you the first time you experience it.
I learned this lesson the hard way. Heading out confident that one card was enough — only to run out of space at exactly the wrong moment. Fortunately I had my backup DSLR with me that day. However, it wasn’t the same. The shots I got on the backup were fine. But they weren’t what I had in mind with the Z8. Consequently, that was the last time I ever left home without multiple cards.
Therefore, here are the rules:
- Always carry at least two cards — minimum. Three is better.
- Format your cards before every shoot — not delete, format. It clears the card properly and reduces the risk of corruption.
- Invest in fast cards — mirrorless burst shooting requires high write speeds. Additionally, slow cards create a buffer bottleneck that causes you to miss frames at critical moments. Look for cards rated V60 or V90 for serious wildlife shooting.
- Keep a backup card in your wallet — always. Furthermore, store used and unused cards in different pockets so you never accidentally reformat a card full of images.
For mirrorless cameras specifically — the CFexpress and UHS-II SD cards that most modern bodies require are significantly faster than older card formats. In fact, the speed difference is immediately noticeable in burst shooting. They’re more expensive, but consequently they’re worth every penny.
Batteries — More Than You Think You Need
Wildlife photography drains batteries faster than almost any other type of photography. Cold temperatures accelerate drain dramatically. Furthermore, mirrorless cameras for all their advantages are generally harder on batteries than DSLRs. This is due to the constant power demands of the electronic viewfinder.
Here’s my rule: however many batteries you think you need, take one more. In fact, take two more.
I’ve been caught out. Heading into the field thinking I was fine only to watch the battery indicator drop faster than expected in cold morning air. As a result I was rationing shots instead of shooting freely. Consequently I missed the relaxed, patient shooting mindset that great wildlife photography demands. Nothing kills your focus like watching a battery indicator and calculating how many frames you have left.
Therefore pack accordingly:
- Minimum two fully charged batteries for a half day shoot
- Three to four batteries for a full day in the field
- Add one extra per battery for every hour below freezing
- A battery grip is worth considering for cold weather shooting — it doubles your battery capacity and keeps spares warm against your body
Additionally, invest in a quality third party charger that can charge two batteries simultaneously. Furthermore, charge everything the night before — never the morning of. As a result you’ll always leave home at 100%.
Lens Filters — Enhancing Your Wildlife Images
Not all filters are essential for wildlife photography. However, two are worth carrying in almost every situation.
A circular polarizer reduces glare and reflections off water and wet surfaces — particularly useful for wetland and shoreline wildlife photography. Furthermore, it deepens sky colors and cuts through atmospheric haze, giving your images a richness and depth that no amount of post processing can fully replicate.
A neutral density filter reduces the amount of light entering the lens — allowing slower shutter speeds for creative motion blur effects. For instance, silky smooth water behind a wading heron or a sense of motion in a running elk herd. Additionally, ND filters give you more creative control in bright midday light when aperture and ISO alone aren’t enough.
Remote Shutter Release — Small Tool, Big Impact
A remote shutter release lets you fire the camera without physically touching it. Consequently, camera shake from pressing the shutter button — particularly at slower speeds — is completely eliminated. Furthermore, for long exposures, time lapse sequences, or shooting from a blind where any movement might spook wildlife, a remote release is invaluable. Therefore, keep one in your kit at all times — they’re inexpensive and take up almost no space.
Rain Covers and Cleaning Kits — Protect Your Investment
Wildlife photography happens in real weather. Rain, dust, mud, river spray — your gear will encounter all of it eventually. In fact, some of the most dramatic wildlife images are captured in exactly these conditions. Therefore, a quality rain cover for your camera and lens is non-negotiable kit.
Additionally, a cleaning kit — lens cloths, a blower, sensor cleaning swabs — belongs in every camera bag. Furthermore, a dirty lens costs you sharpness and contrast in every single image until you clean it. Consequently, take two minutes to clean your glass before every shoot. It’s one of the simplest and most overlooked improvements a photographer can make.
Conclusion – Gear Up. Get Wild.
Wildlife photography is one of the most rewarding and humbling pursuits a photographer can undertake. Furthermore, it will test your patience, challenge your skills, and push your gear to its limits. However, it will also reward you with moments so extraordinary that no studio shoot, no portrait session, and no landscape image can quite match the feeling.
The gear matters. In fact, the right gear matters enormously — as everything in this guide has hopefully made clear. However, gear is ultimately just the vehicle. Consequently, the most expensive mirrorless body and the sharpest telephoto prime in the world won’t save a shot if you’re not in the right place, at the right time, with the patience to wait for the moment to unfold naturally.
Therefore, invest wisely. Start with what you can afford. Learn it inside out. Furthermore, add to your kit deliberately and purposefully — driven by the specific limitations you encounter in the field, not by spec sheets or gear envy.
Additionally, make mistakes. Run out of battery once and you’ll never forget a spare again. Pack the wrong lens once and your pre-shoot checklist becomes a habit for life. In fact, some of the most valuable lessons in wildlife photography come directly from the moment’s things go wrong in the field.
Most importantly — get out there. Learn your gear. Trust your instincts. Respect the wild and everything in it.
The gear is ready. The wild is waiting.
Gear up. Get wild. Leave no trace.
Frequently Asked Questions
Start with glass, not the camera body. In fact, a great lens on a modest camera body will consistently outperform a great camera body with a mediocre lens. Furthermore, lenses hold their value far better than camera bodies — consequently, a quality telephoto lens is an investment that will serve you across multiple camera upgrades. Start with a versatile telephoto zoom in the 100-500mm or 200-600mm range and build from there.
Mirrorless has genuinely become the better choice for most wildlife photographers. However, if you already have a collection of quality DSLR glass, don’t rush to switch — most mirrorless systems have excellent lens adapters that work seamlessly. Furthermore, the silent shooting alone was enough to make me switch to the Nikon Z8 and I haven’t looked back. Additionally, the autofocus tracking on modern mirrorless bodies is extraordinary — birds in flight, fast-moving mammals, unpredictable subjects — all handled with a confidence that would have seemed impossible a few years ago.
Not necessarily — and in some situations a crop sensor is actually advantageous. In fact, the crop factor effectively multiplies your focal length — a 400mm lens on a crop sensor behaves like a 600mm lens. Consequently, for photographers on a budget who can’t yet invest in super-telephoto glass, a crop sensor body can bring distant wildlife significantly closer. Furthermore, crop sensor bodies tend to be lighter and more compact — ideal for long backcountry hikes. However, full-frame sensors do deliver superior low-light performance — which matters enormously at dawn and dusk when wildlife is most active.
It depends entirely on what you’re photographing and how close you can get. However, as a general rule — 300mm minimum, 400-600mm ideal for most wildlife situations. Furthermore, birds in flight and smaller mammals require more reach than larger animals you can observe from a vehicle. Additionally, remember that a versatile zoom gives you flexibility that a prime lens doesn’t — consequently, for most photographers starting out, a telephoto zoom is the smarter first investment.
More than you think you need. In fact, this is one of the most common and most avoidable mistakes in wildlife photography. Therefore, carry a minimum of two fully charged batteries for a half day shoot — three to four for a full day. Furthermore, never head out with a single memory card. Always carry at least two, format them before every shoot, and invest in fast cards rated V60 or V90 for mirrorless burst shooting. Consequently, you’ll never have to ration shots when the action is happening in front of you.
Absolutely — especially for wildlife photography. In fact, the combination of long focal lengths, low light conditions, and fast-moving subjects makes image stabilization one of the most valuable features you can have in your kit. Furthermore, modern in-body stabilization systems on mirrorless cameras like the Nikon Z8 are extraordinary — allowing sharp handheld shots at shutter speeds that would have been impossible even a few years ago. Therefore, when evaluating both cameras and lenses, don’t overlook stabilization specs.
Honestly? Gloves. Furthermore, a pre-shoot checklist. In fact, the number of shots lost to cold, unresponsive fingers and forgotten gear is far higher than most photographers would admit. Additionally, a remote shutter release, a quality rain cover, and a spare battery are all consistently underestimated until the moment you desperately need them. Therefore, sweat the small stuff — because in the field, the small stuff matters enormously.
Additional Considerations — The Details That Make the Difference
The big ticket items get all the attention — cameras, lenses, tripods. However, it’s often the smaller, easier-to-overlook considerations that separate a good day in the field from a great one. Furthermore, some of the most valuable additions to your wildlife photography kit cost almost nothing. In fact, they’re just good habits.
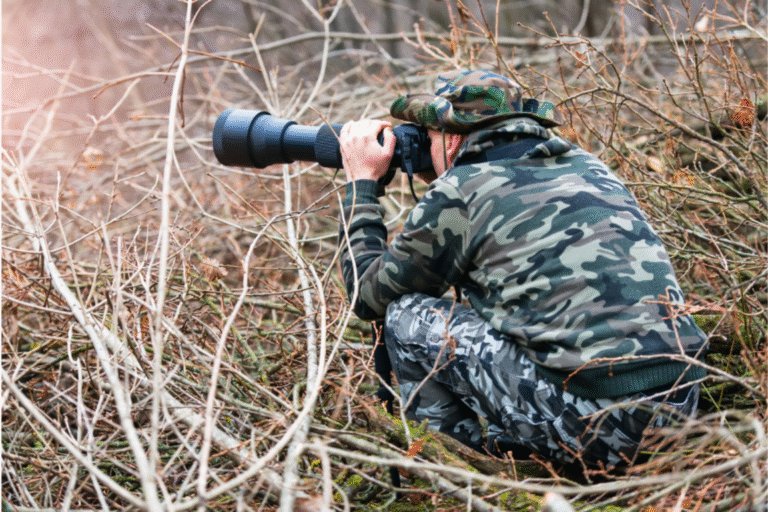
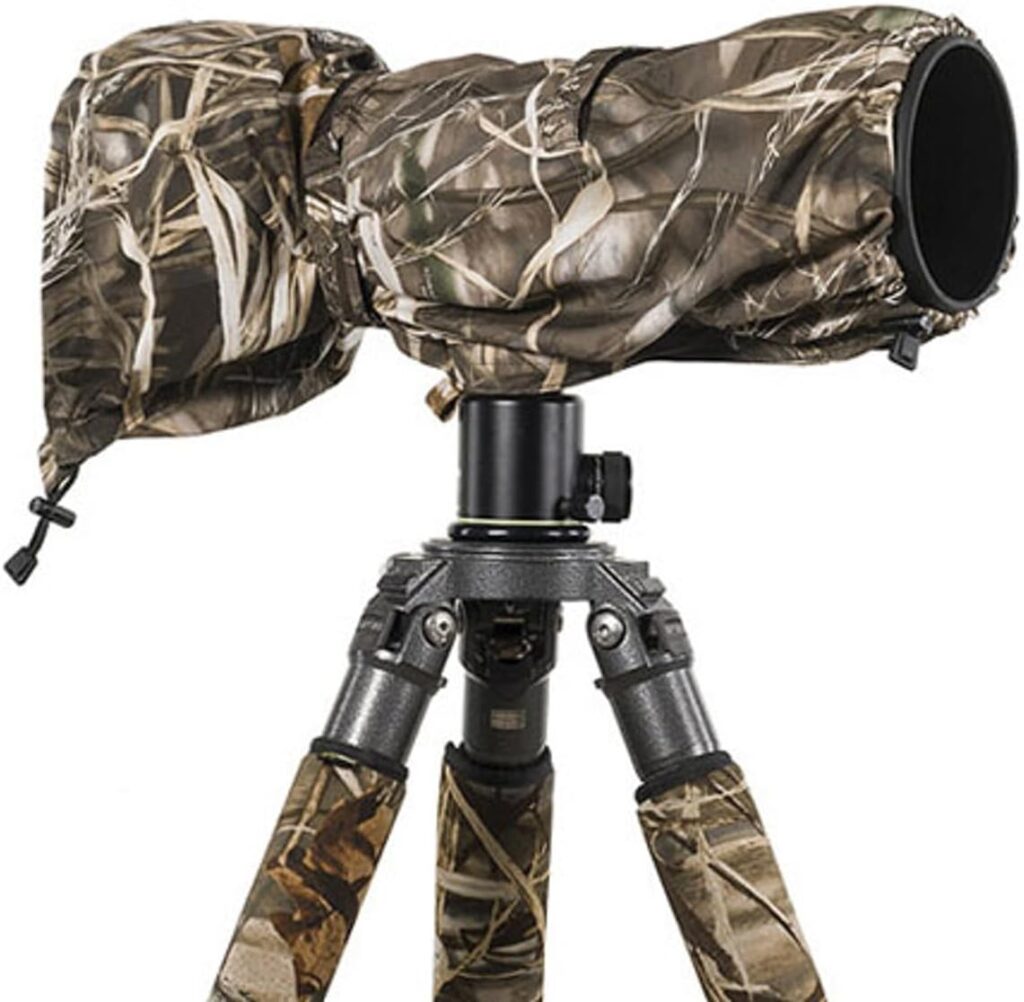
Camouflage and Concealment — Become Part of the Environment
A quality blind, ghillie suit, or camouflage netting isn’t traditional gear in the camera sense. However, it might be the single most impactful addition to your wildlife photography kit after your camera and lens. Furthermore, blending into your environment doesn’t just reduce your visibility — it changes how wildlife behaves around you entirely. As a result, animals act naturally, feed freely, and give you access to intimate, unguarded moments that a visible human presence would never allow.
Additionally, think beyond just yourself. Wildlife can be surprisingly wary of camera equipment too. Consequently, lens covers and wraps with camouflage patterns keep your glass less conspicuous — particularly important for bird photography where even a large white telephoto lens can cause alarm.
👉 Read our full guide: Complete Camouflage Guide for Wildlife Photographers
Clothing — Your First Line of Field Preparation
Wildlife photography involves long hours outdoors in variable and often extreme conditions. Furthermore, what you wear directly impacts how long you can stay out — and therefore how many opportunities you have to capture that defining shot.
Choose quiet, breathable layers in neutral tones that blend naturally with your environment. Additionally, avoid bright colors that startle wildlife and synthetic materials that rustle loudly with every movement. Waterproof outer layers, moisture-wicking base layers, and gloves with dexterous fingertips are non-negotiable in cold or wet conditions. Furthermore, don’t forget your head and ears — heat escapes fastest from an uncovered head and frozen ears are a serious distraction when you’re trying to stay focused on a wolf pack moving through the treeline.
👉 Read our full guide: Seasonal Clothing for Wildlife Photographers — coming soon
Spare Parts — The Boring Stuff That Saves the Day
Lens caps. Cable ties. A small roll of gaffer tape. Extra lens cloths. A blower. These are the unglamorous, easy-to-forget items that you’ll never think about until you desperately need one and don’t have it. Furthermore, in a remote location miles from the nearest town, a missing lens cap or a loose tripod foot can genuinely derail a shoot.
Therefore, develop a permanent spares kit that lives in your bag and never gets depleted without being immediately replaced. Additionally, check it before every trip — consequently you’ll never be caught short in the field.
Camera Insurance — Protect Your Investment
Wildlife photography takes your gear into unpredictable, demanding environments. Rain, dust, river crossings, rough terrain, extreme temperatures — your kit will face all of it eventually. Furthermore, accidents happen even to the most careful photographers.
Therefore, consider proper camera insurance seriously. In fact, many standard home insurance policies either don’t cover camera equipment at all or severely limit payouts for professional or semi-professional gear used outdoors. Consequently, a dedicated camera insurance policy gives you the peace of mind to shoot confidently in challenging conditions — knowing that if something goes wrong, you’re covered.
One Final Reminder
Gear is important. In fact, the right gear matters enormously — as everything in this guide has hopefully made clear. However, gear is ultimately just the vehicle that gets you to the shot.
Furthermore, the photographers who consistently come home with extraordinary images aren’t necessarily the ones with the most expensive kit. They’re the ones who understand animal behavior. They scout their locations obsessively. Early mornings and late evenings are their natural habitat. Patience isn’t just a virtue for them — it’s a discipline they practice on every single shoot. Additionally, they’re the ones who respect the wild — who understand that the ethical foundation of wildlife photography is just as important as the technical one.
Therefore, use this guide as your foundation. Build your kit deliberately. Learn your gear inside out. And above all else — get out there.
Gear up. Get wild. Leave no trace.